How to Rip Music from a CD on Windows 11 Without Installing Extra Software

Have you ever bought a music CD and wanted to put the songs on your computer or phone, but you did not know how? Today I will show you how to get music files off a CD. People call this “Rip”. We will do it on Windows 11, and we do not need to find or install any extra software!
What is Rip?
Rip means we copy the audio from a music CD into digital files on our computer. We get music files like .mp3, .wma, .flac, or other formats. Then it is easy to play them on many devices.
Steps to Rip on Windows 11
It is very easy. Let’s follow the steps one by one.
1. Put in the CD
The first step is to put your music CD into the CD/DVD drive of your computer.
But wait… most new computers do not have a CD slot anymore, right? Don’t worry. You can buy an External CD/DVD Drive and plug it in. It is not expensive at all.
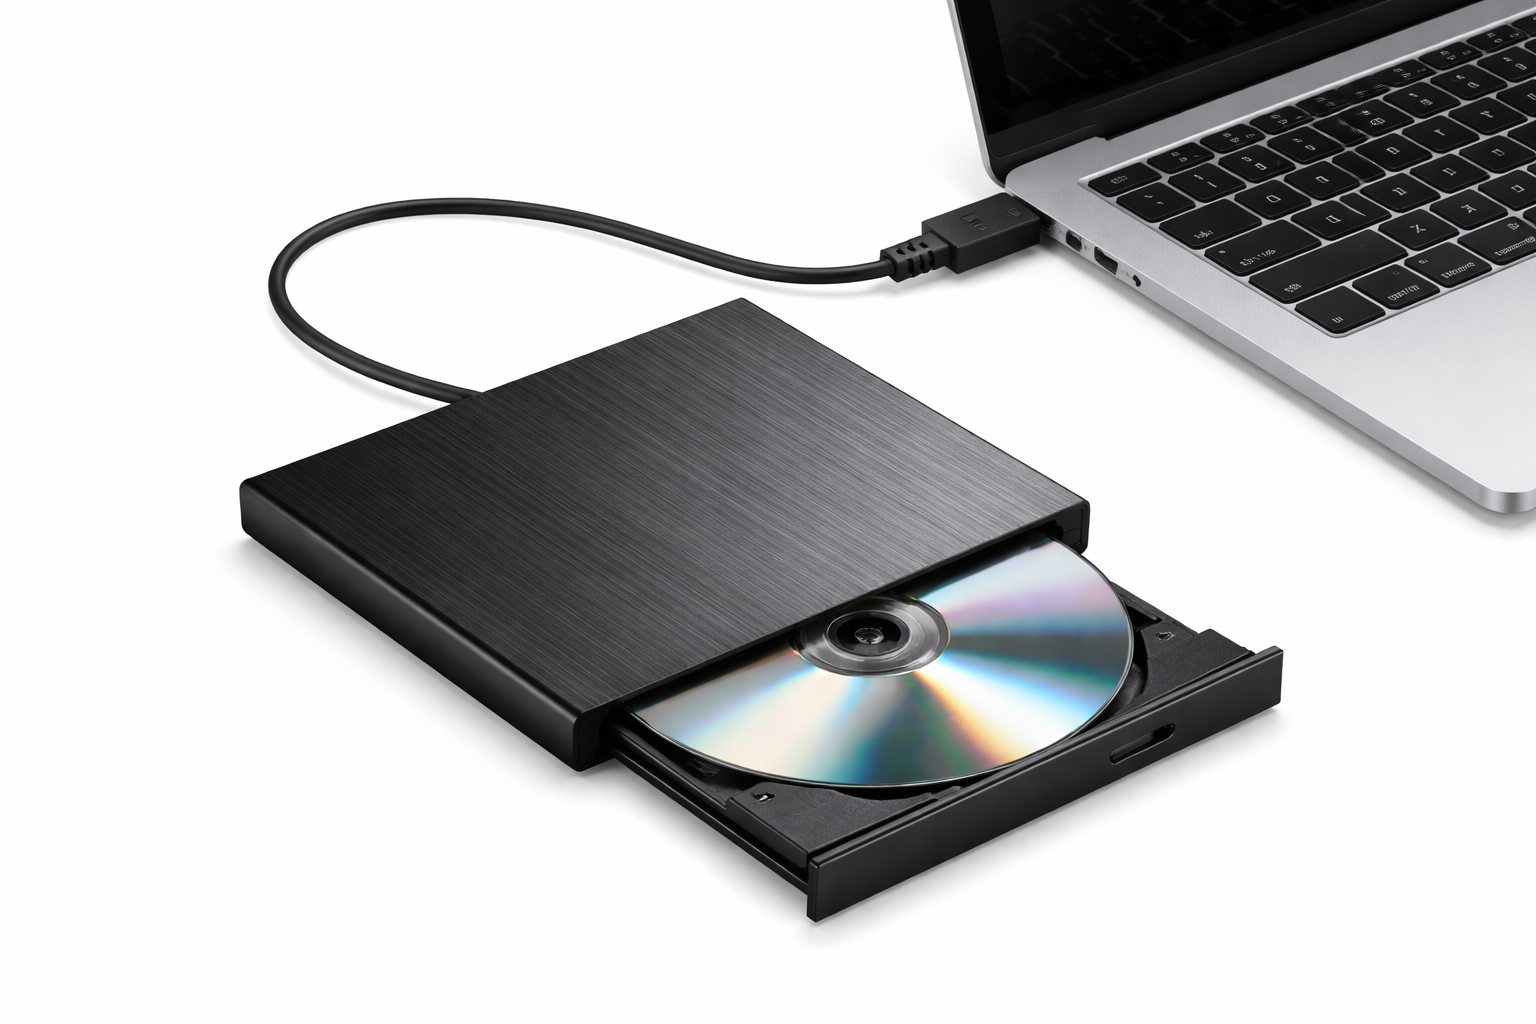
(Note: The links below for buying an External CD/DVD Drive are Affiliate Links. If you buy through these links, I will get a small commission. It gives me energy to keep making content.)
- ลิงก์สำหรับซื้อ EXTERNAL DVD ASUS SDRW-08D2S-U LITE (BLACK) (USB-A)
- ลิงก์สำหรับซื้อ Ext.Slim DVD RW 8X ASUS (08D2S-U) Lite Black - A0046699
- ลิงก์สำหรับซื้อ ASUS Ext.Slim DVD RW ASUS (08D2S-U Lite) White - A0046467
2. Open the Media Player app
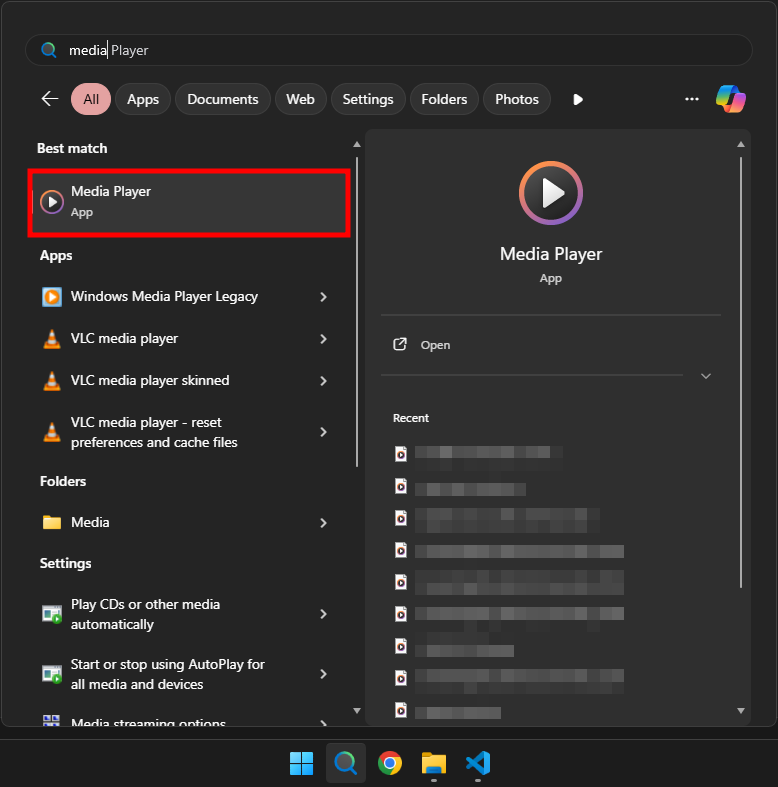
Next, search for “Media Player” and open it. This is the new media player that comes with Windows 11.
3. Go to the Audio CD tab
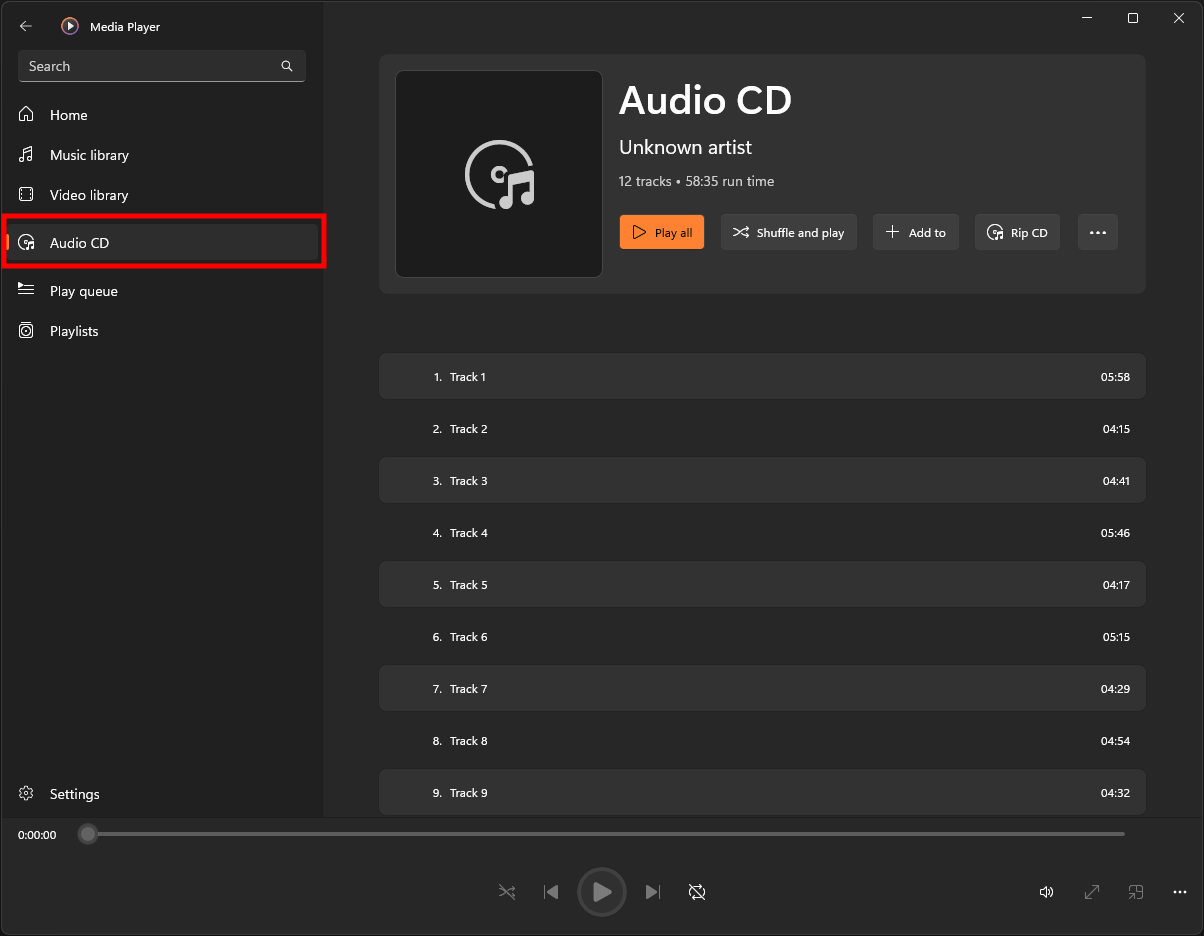
When the app opens, look at the menu on the left. Find the name of your CD. It may say “Audio CD”, or it may show the album name. Click it. You will see all the songs on the disc.
At this point, the song info, like the song name and the artist name, may show up. Or you may only see “Track 1”, “Track 2”. It depends on whether the app’s database knows this album.
4. Set up the Rip settings
Before we click Rip, I suggest you check the settings first. Click the “Rip settings” menu.
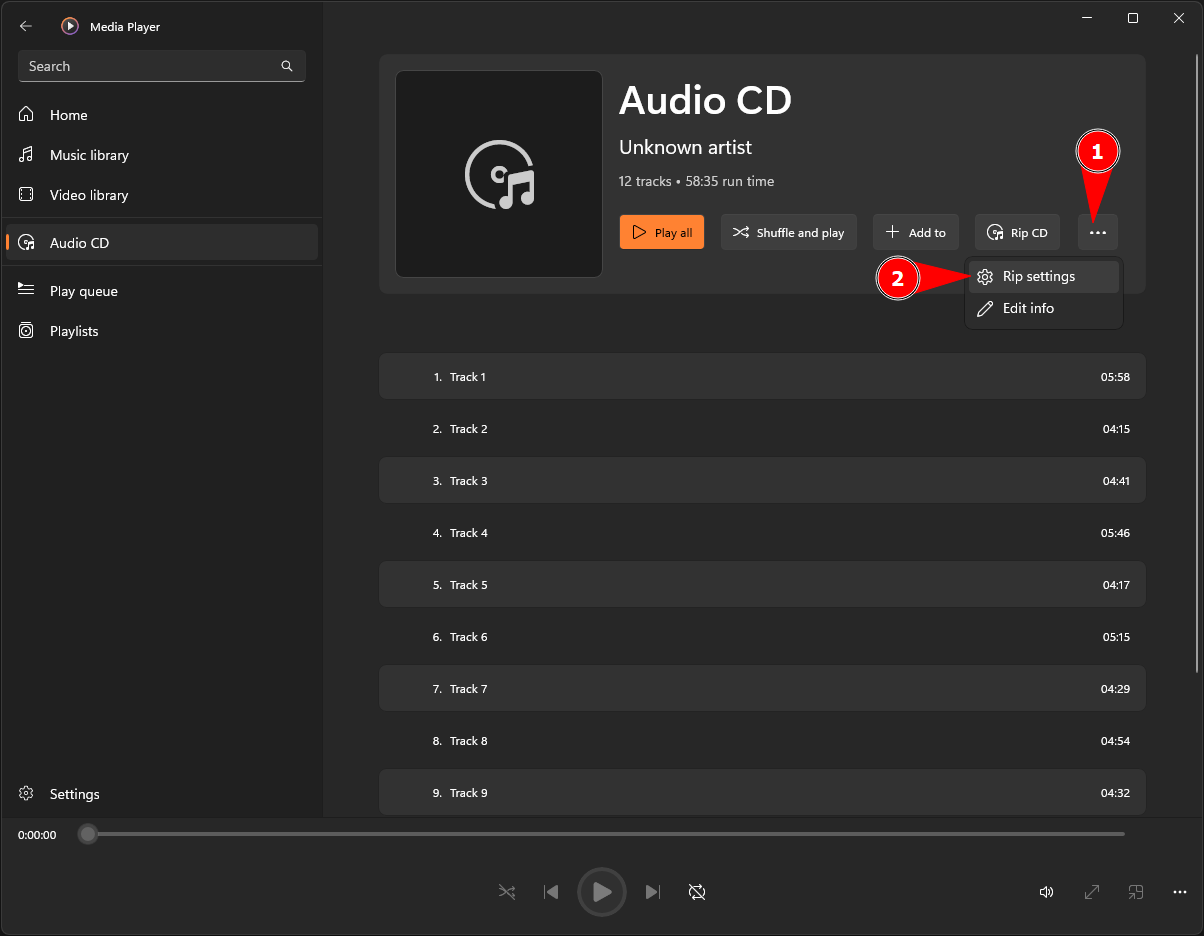
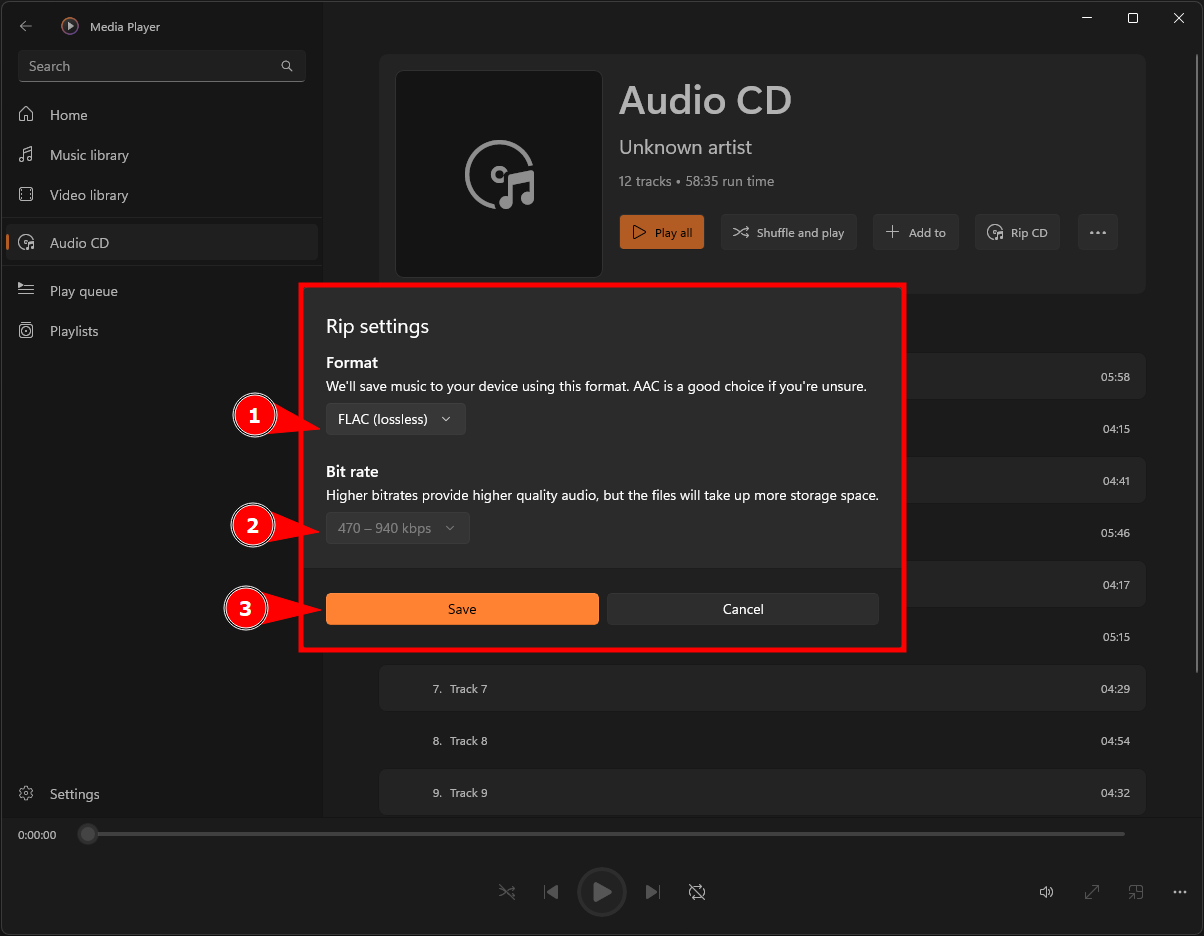
Here you can choose the Format (the file type) and the Audio quality (or Bit rate) that you want.
- Format: I suggest
MP3. It is the most popular format, and every device can play it. If you want the best sound quality with no compression, you can chooseFLAC (lossless). - Audio quality (Bit rate): A higher number gives better sound, but the file gets bigger too. For
MP3, I suggest320 kbps. That is already very good quality. (Some formats, likeFLAC, do not let you choose the Bit rate.)
When you finish, click “Save”.
5. Click Rip CD
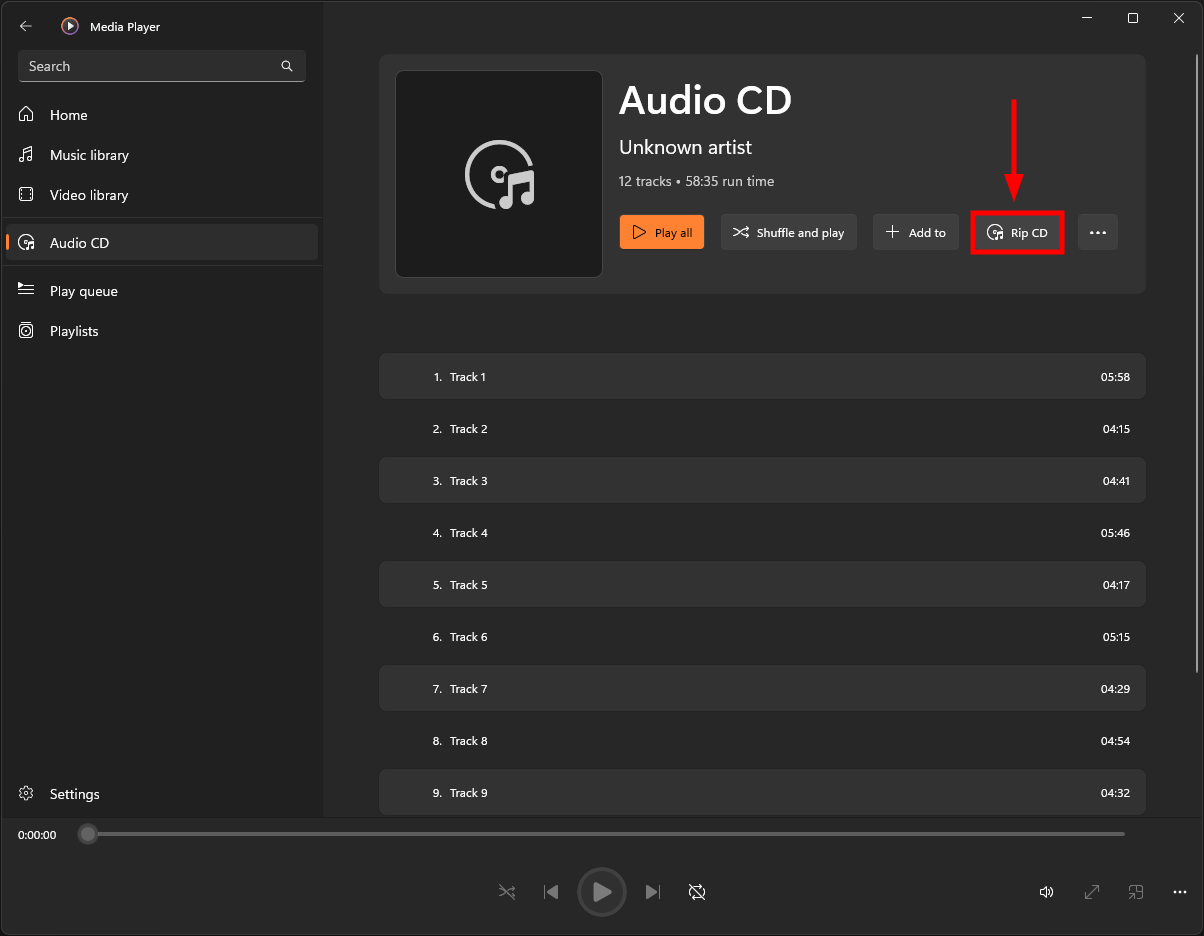
When you are ready, just click the “Rip CD” button!
6. (Optional) Edit the song info before you Rip
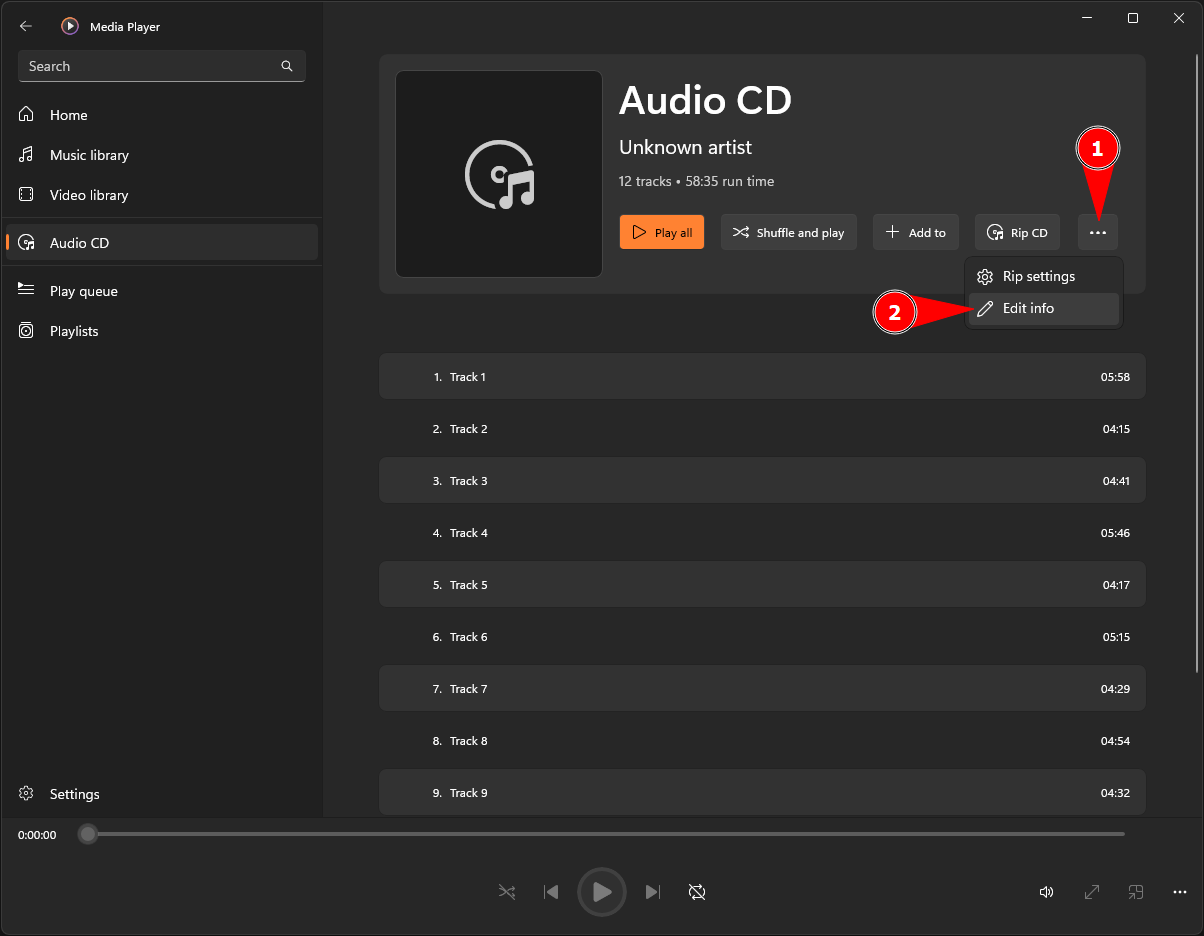
Maybe the app does not show the song info (you only see Track 1, Track 2…), and you want to add the info yourself before you Rip. You can do that. Click “Edit info”.
Then fill in the details. You can add the album name, the artist name, the genre, the release year, each song name, and even the album cover. When you finish, click “Rip”.
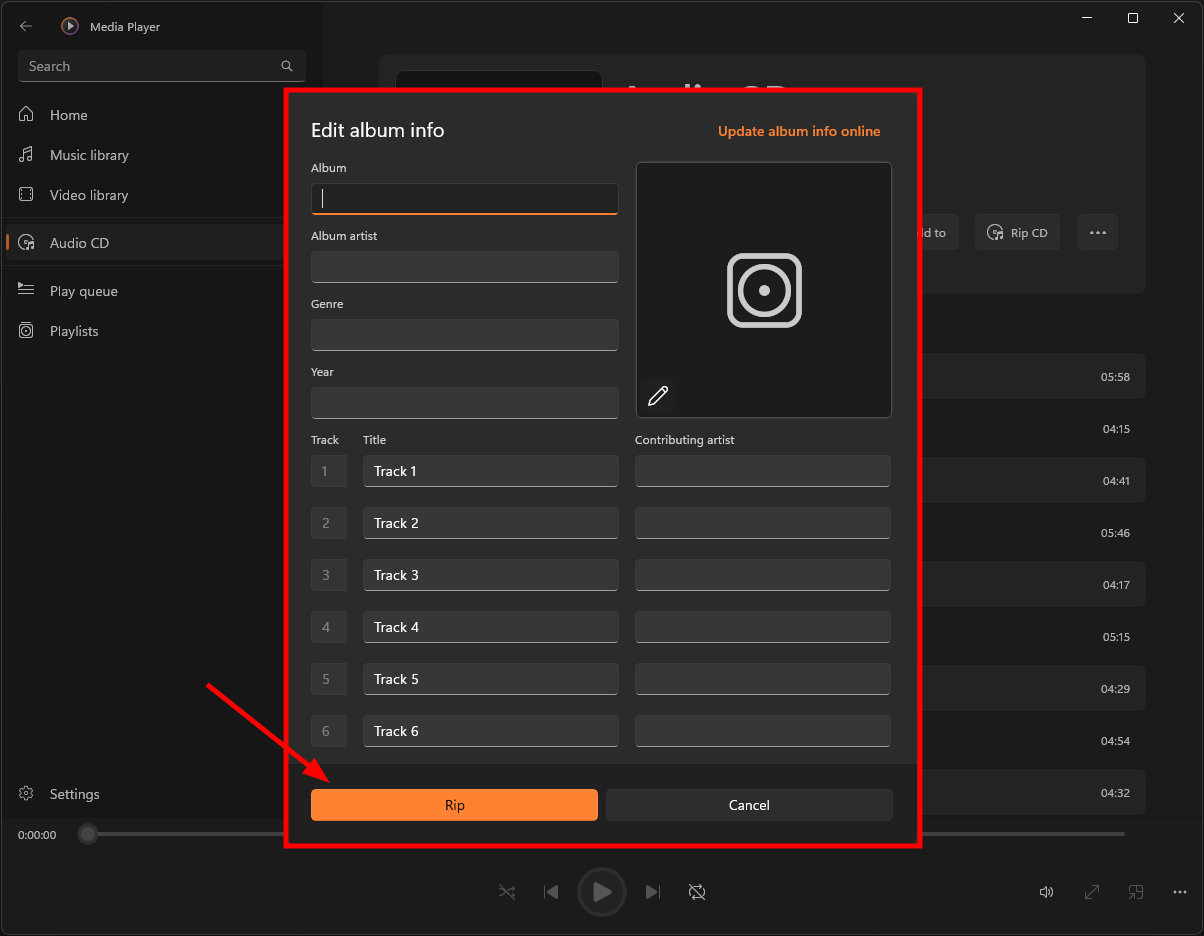
Personally, I often just Rip first with no song info. I fix the info later with a program called Mp3tag. It is a free program, and it is very good at managing the tags of music files. It is much easier!
7. Wait until it finishes
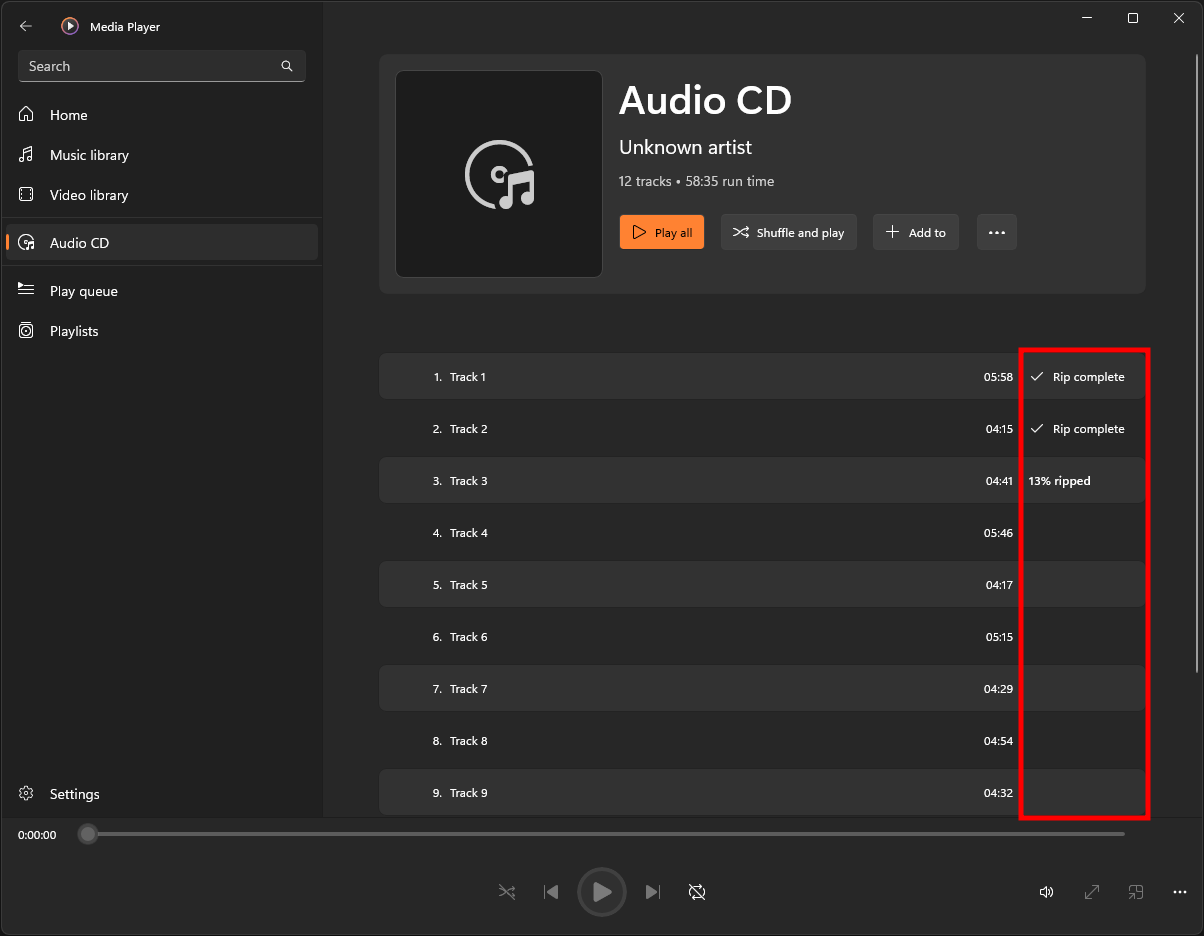
Now we just wait. The app will Rip the songs from the disc one by one. The status of the song that is being ripped shows as n% ripped. When it finishes, the status changes to “Rip complete”.
8. Find your music files
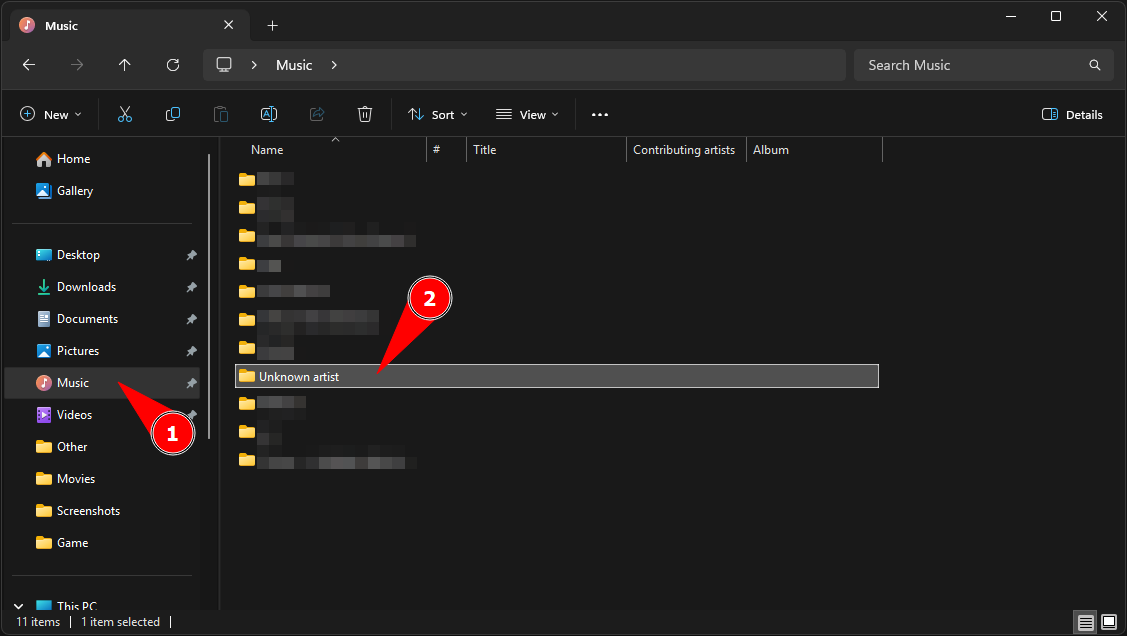
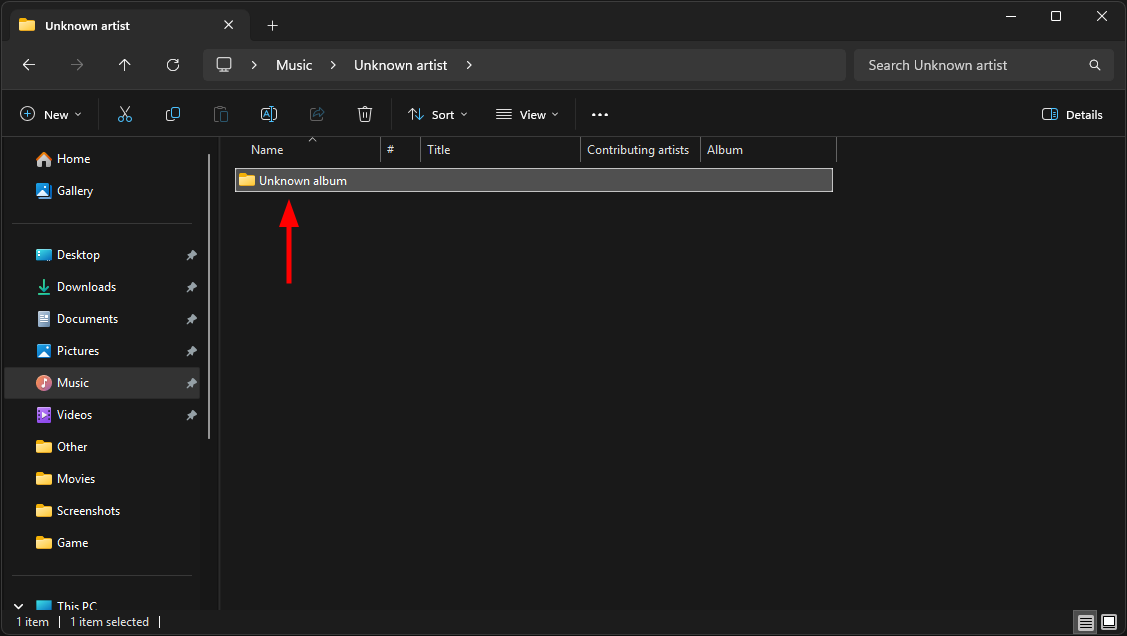
When all the songs are done, your music files are saved in the Music folder. Usually the app makes a folder with the artist name, and inside it there is a folder with the album name.
If you cannot find them, try this path: C:\Users\<YourUser>\Music (change <YourUser> to your own user name).
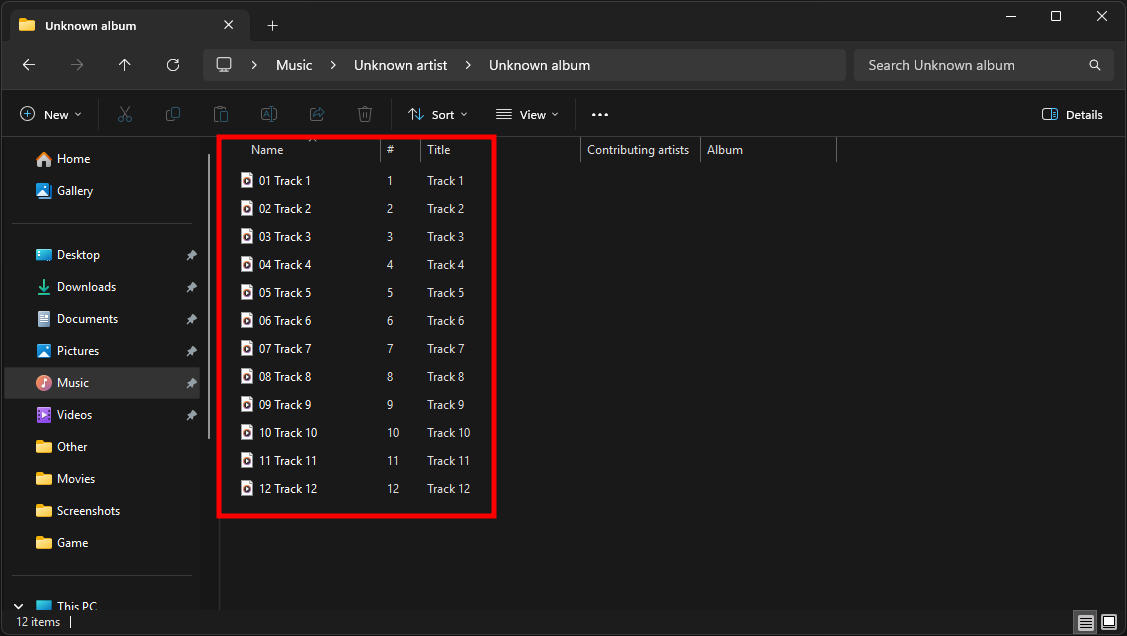
That is all! Now we have the music files from the CD on our computer. You can put them on your phone or a portable music player right away.
I hope this helps you.
Thank you!