How to Rip Music From a CD on macOS Without Installing Anything

Have you ever bought a music CD and wanted to put the songs on your computer or phone, but you didn’t know how? Today I will show you how to get music files off a CD. People call this “ripping”. We will do it on macOS, and you don’t need to install any extra app!
What is Rip?
To Rip means to copy the sound data from a music CD into digital files on your computer. You get music files like .mp3, .aac, .flac, or other formats. Then you can play them on many devices more easily.
Steps to Rip on macOS
It’s really easy. Let’s follow the steps one by one.
1. Put in the CD
The first step is to put your music CD into the CD/DVD drive of your computer.
But wait… most new computers don’t have a CD slot anymore, right? Don’t worry. You can buy an External CD/DVD Drive and plug it in. It’s not expensive at all.
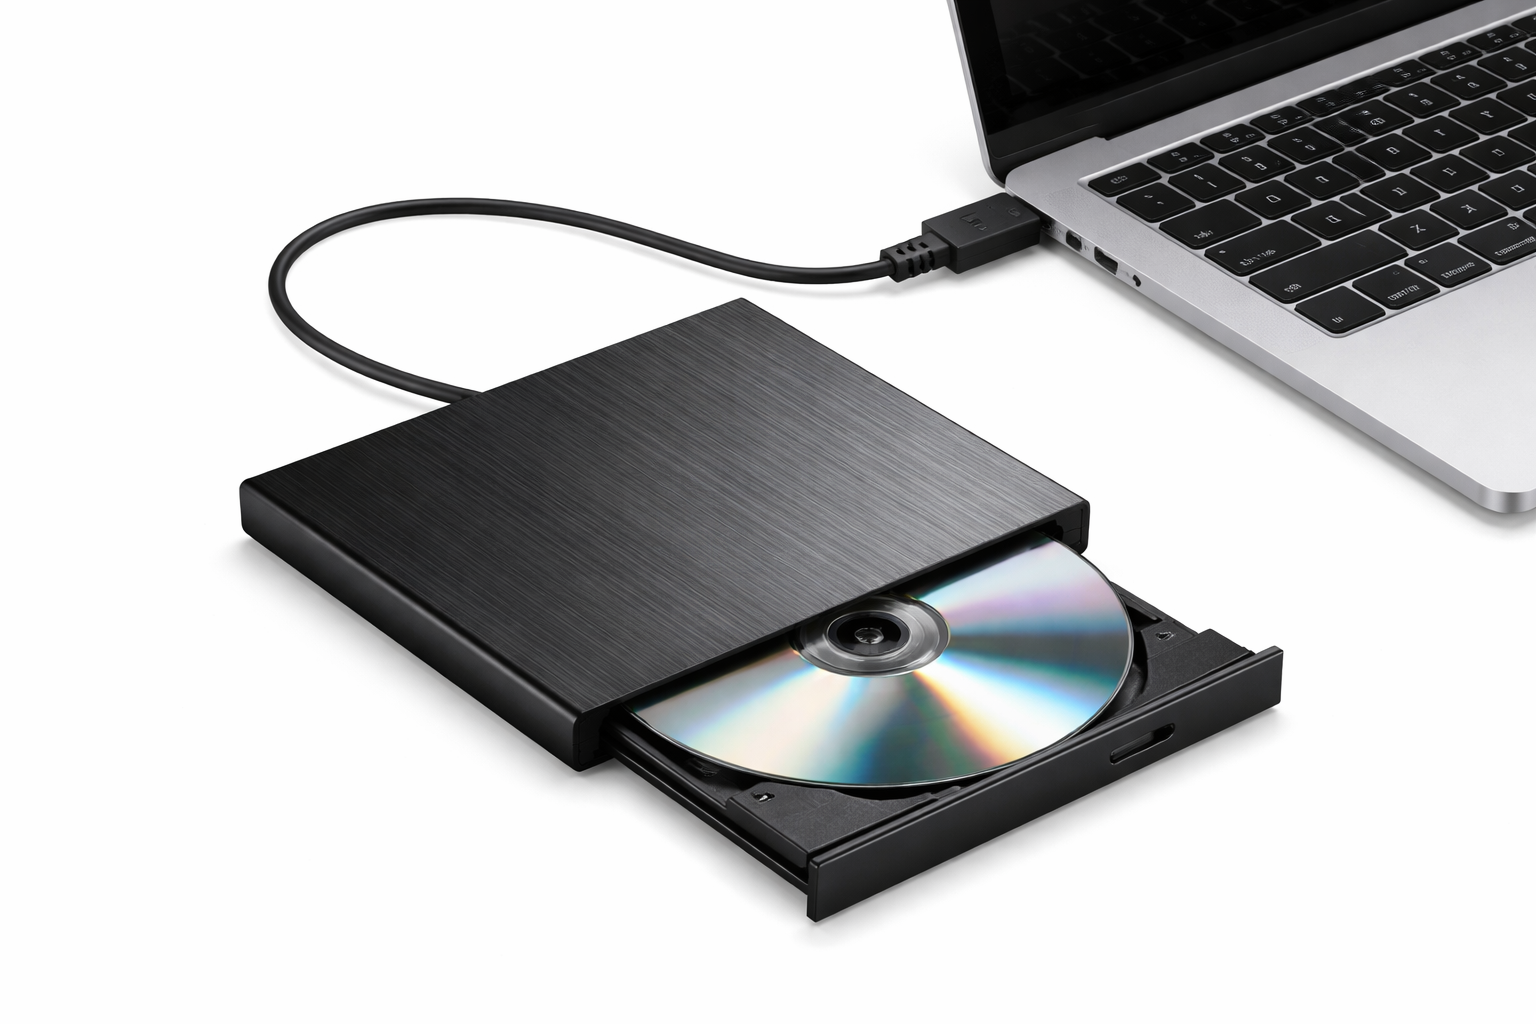
(Note: The links below for buying an External CD/DVD Drive are Affiliate Links. If you buy through them, I will get a small commission. It helps me keep making content.)
- Link to buy EXTERNAL DVD ASUS SDRW-08D2S-U LITE (BLACK) (USB-A)
- Link to buy Ext.Slim DVD RW 8X ASUS (08D2S-U) Lite Black - A0046699
- Link to buy ASUS Ext.Slim DVD RW ASUS (08D2S-U Lite) White - A0046467
2. Open the Music app
Most of the time, the Music app opens by itself after you put in the CD. If it doesn’t open, you can open it yourself. Search for “Music” in Spotlight Search (press Cmd + Space) and press Enter.

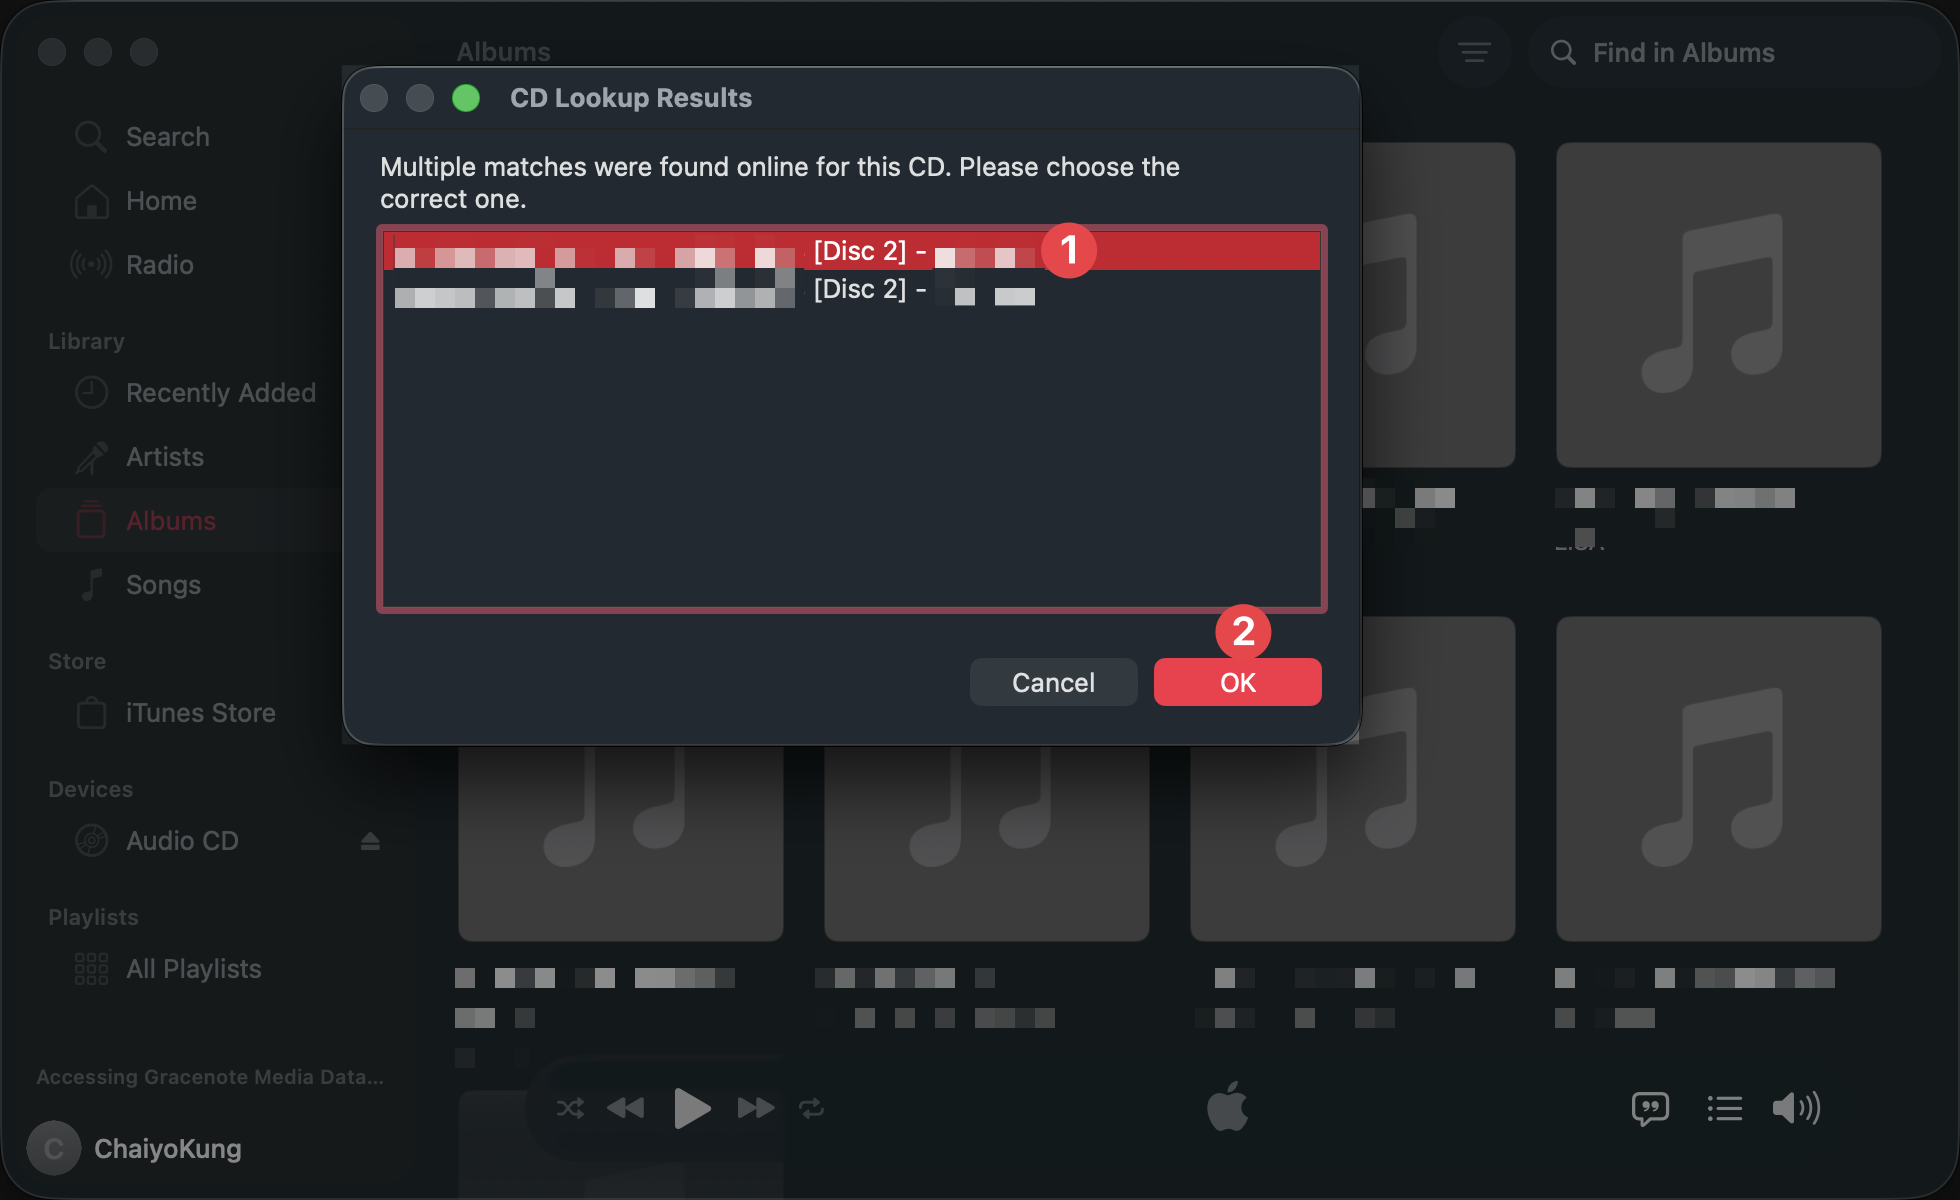
3. Choose the album info (if it asks)
When the Music app opens, a “CD Lookup Results” window may pop up. It lets you pick the album and song info from an online database. Pick the right one, or the one you like, and click OK.
4. Click Import CD
Next, the Music app may ask if you want to import the songs from the CD. Click “Yes” to start ripping.
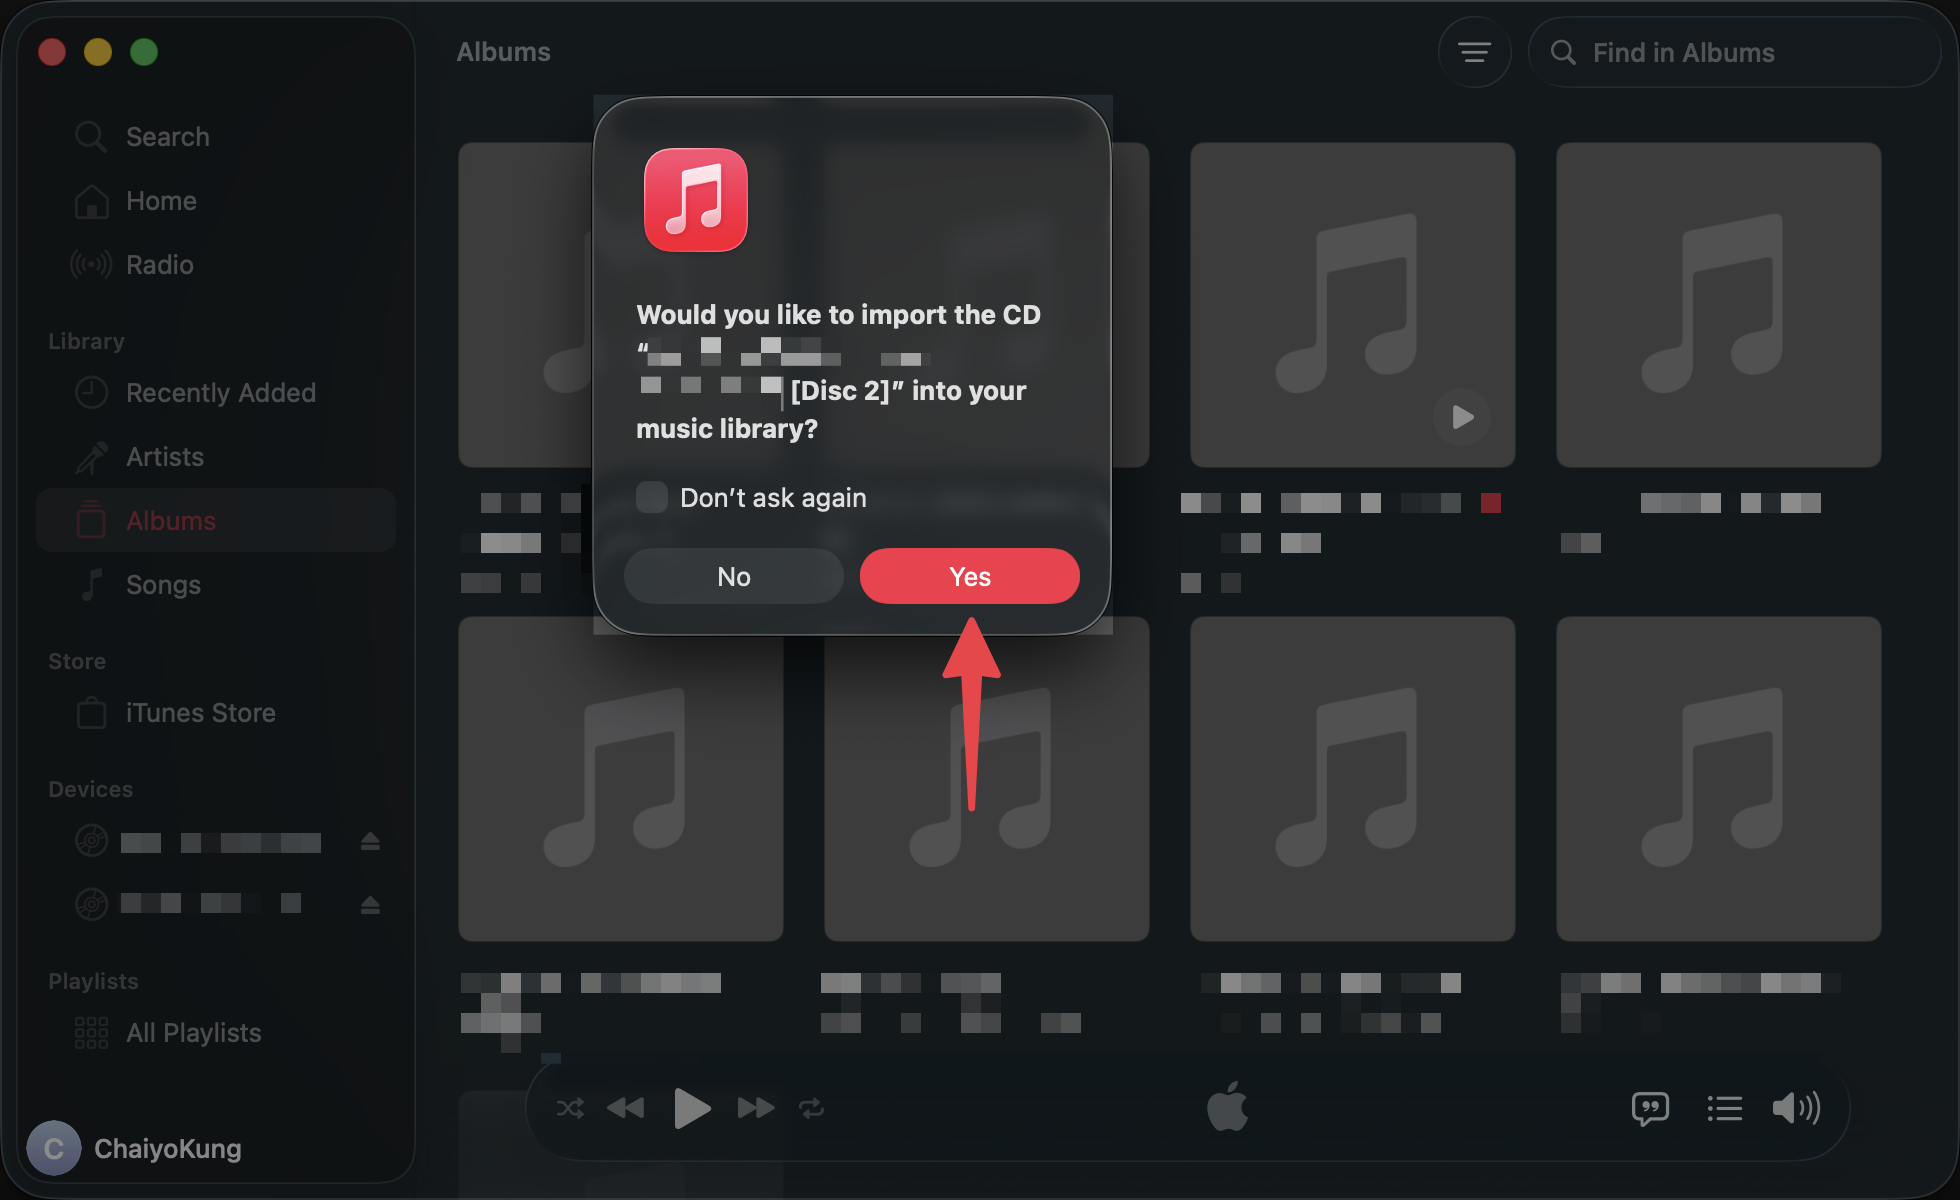
If the Import CD window doesn’t show up, look at the sidebar on the left. You will see the name of your CD under “Devices”. Click that name, then click the “Import CD” button at the top right of the window.
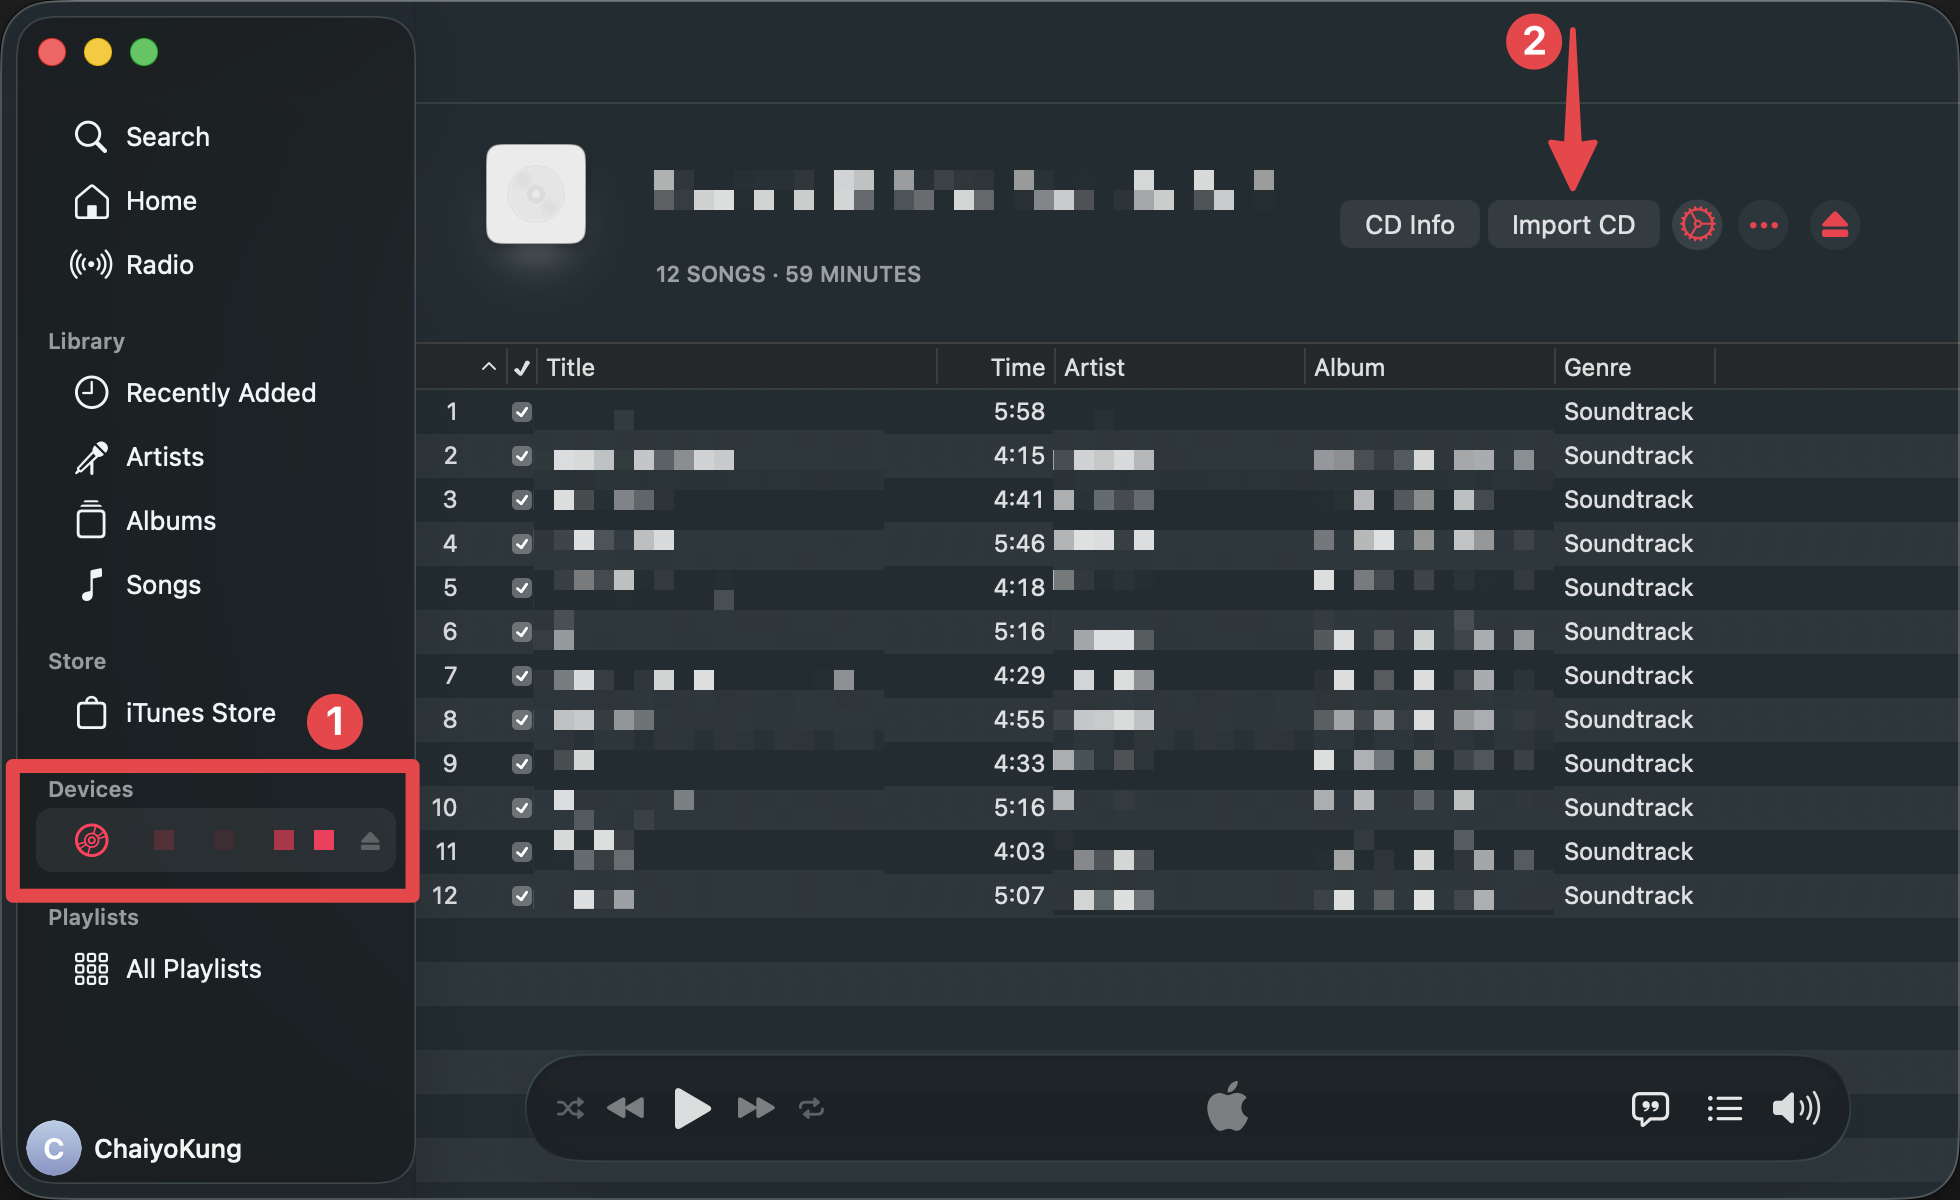
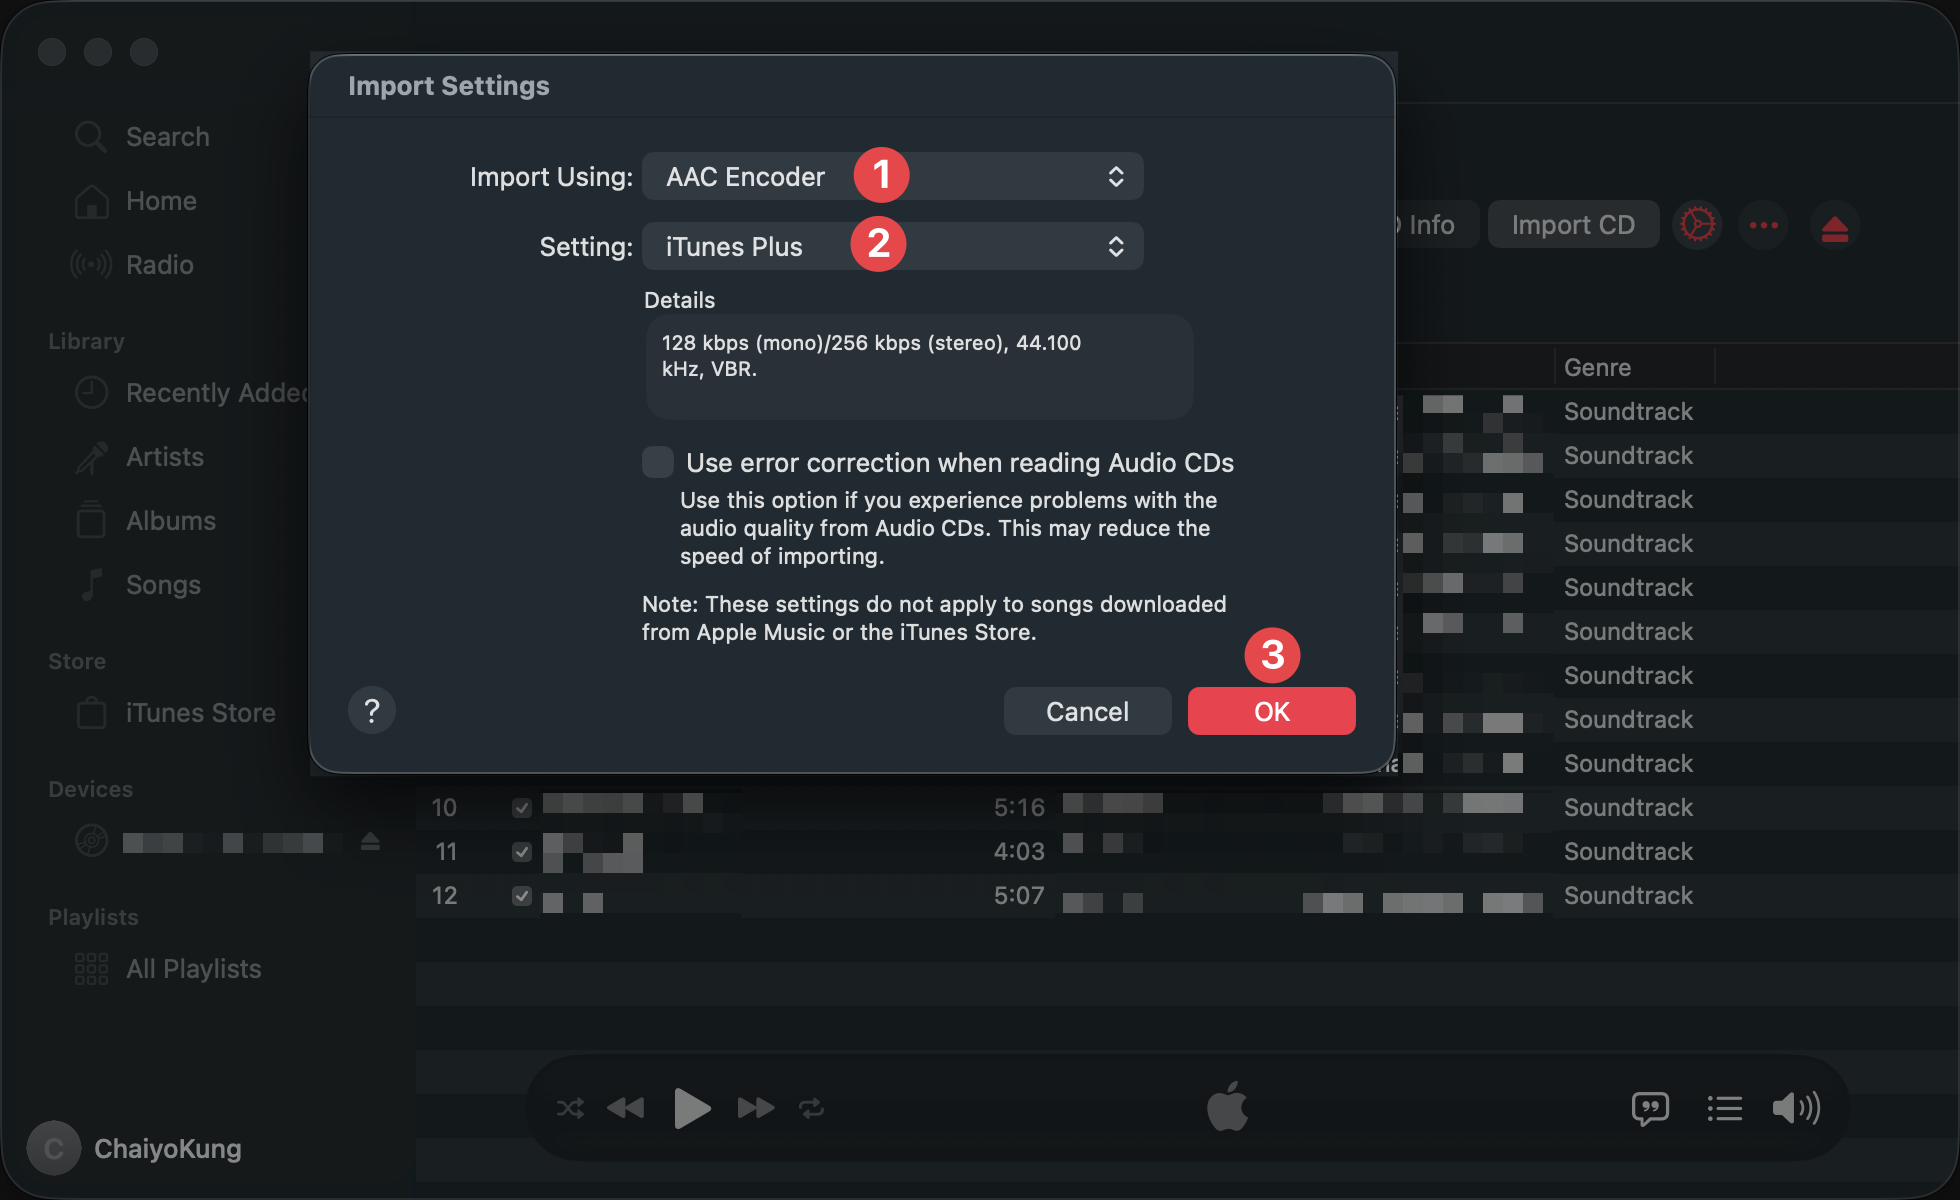
5. Set up the Rip (Import Settings)
An “Import Settings” window will pop up. Here you choose the format and the quality of the music files you want to rip.
When you finish the settings, click “OK”.
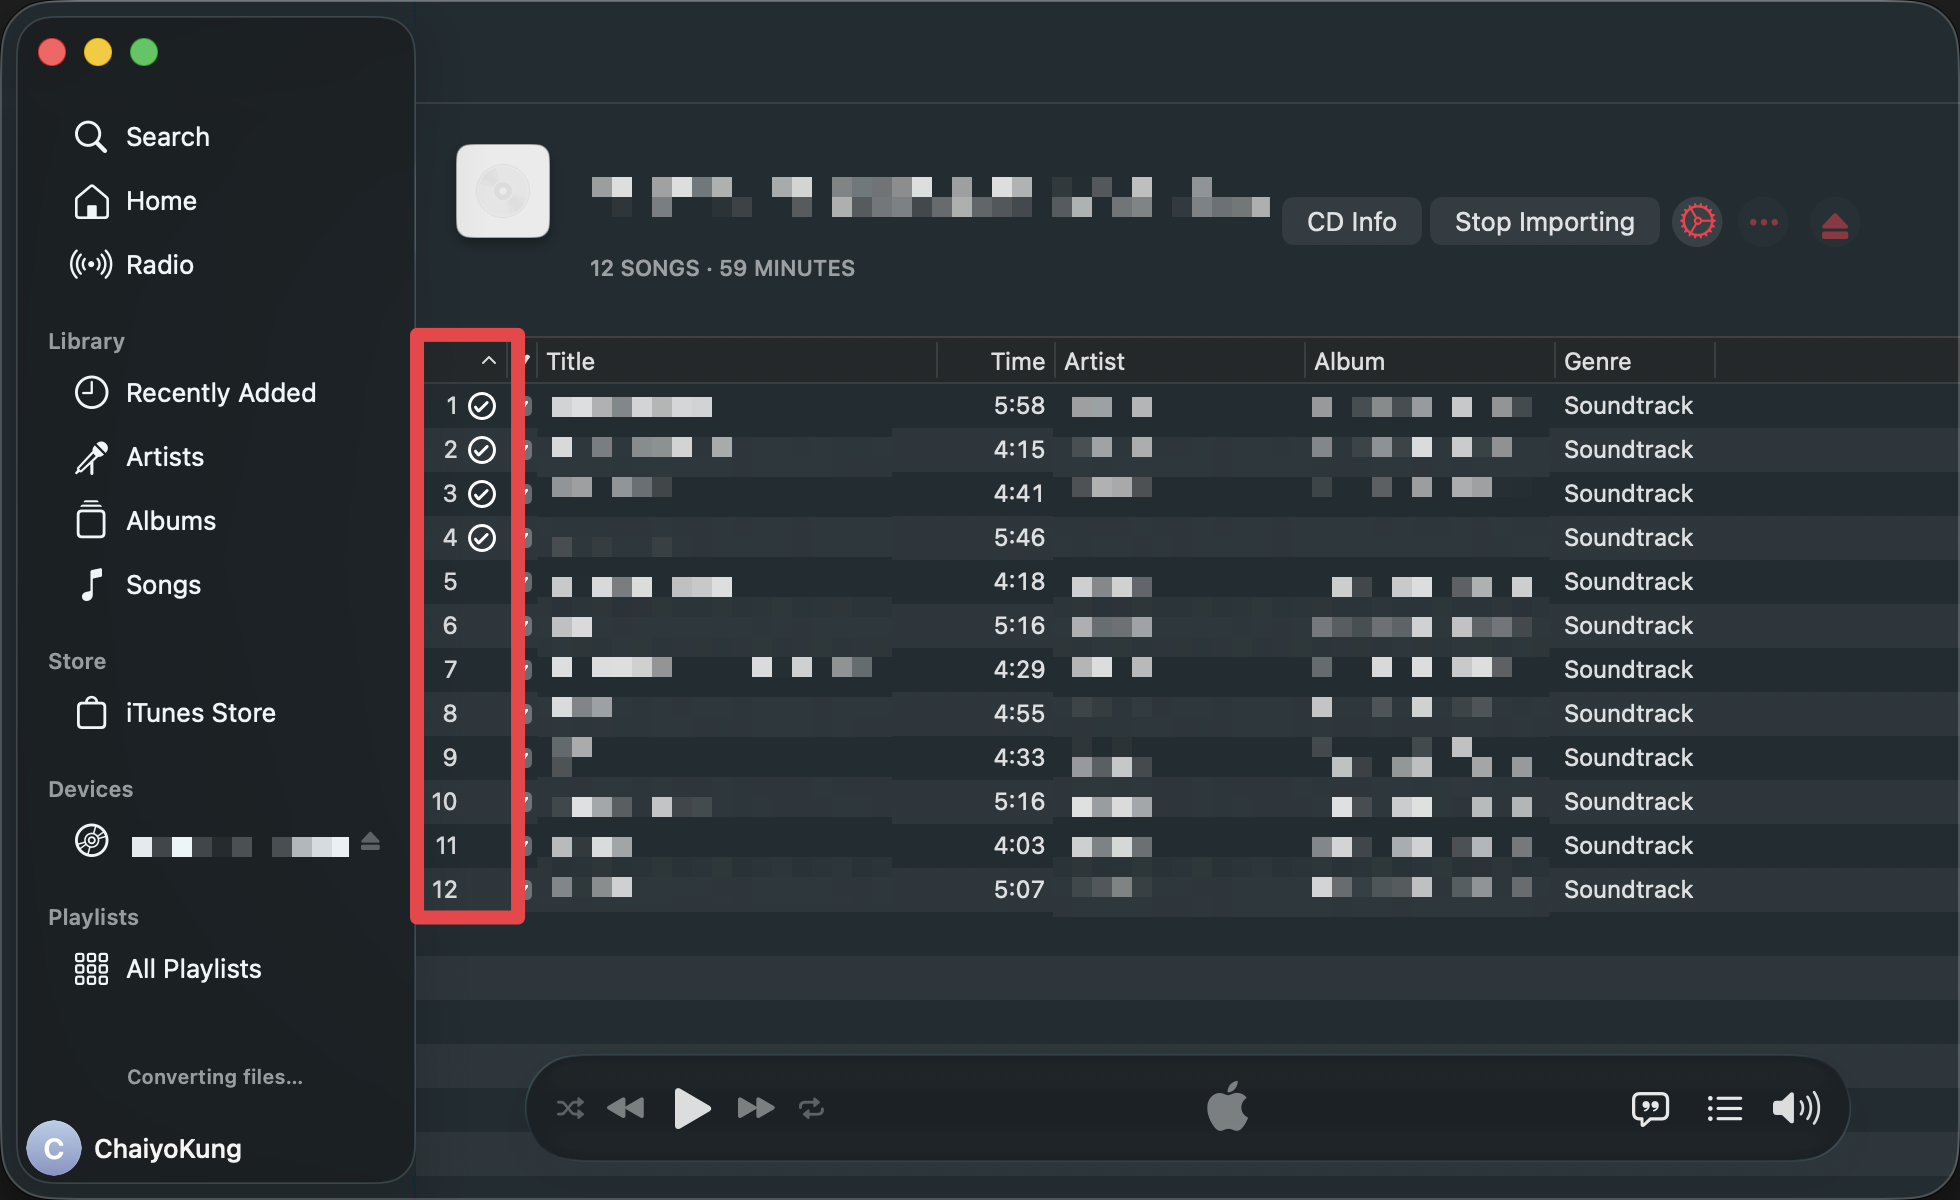
6. Wait until it finishes
Now you just wait. The app rips the songs from the disc one by one. When a song is done, a check mark appears next to it.
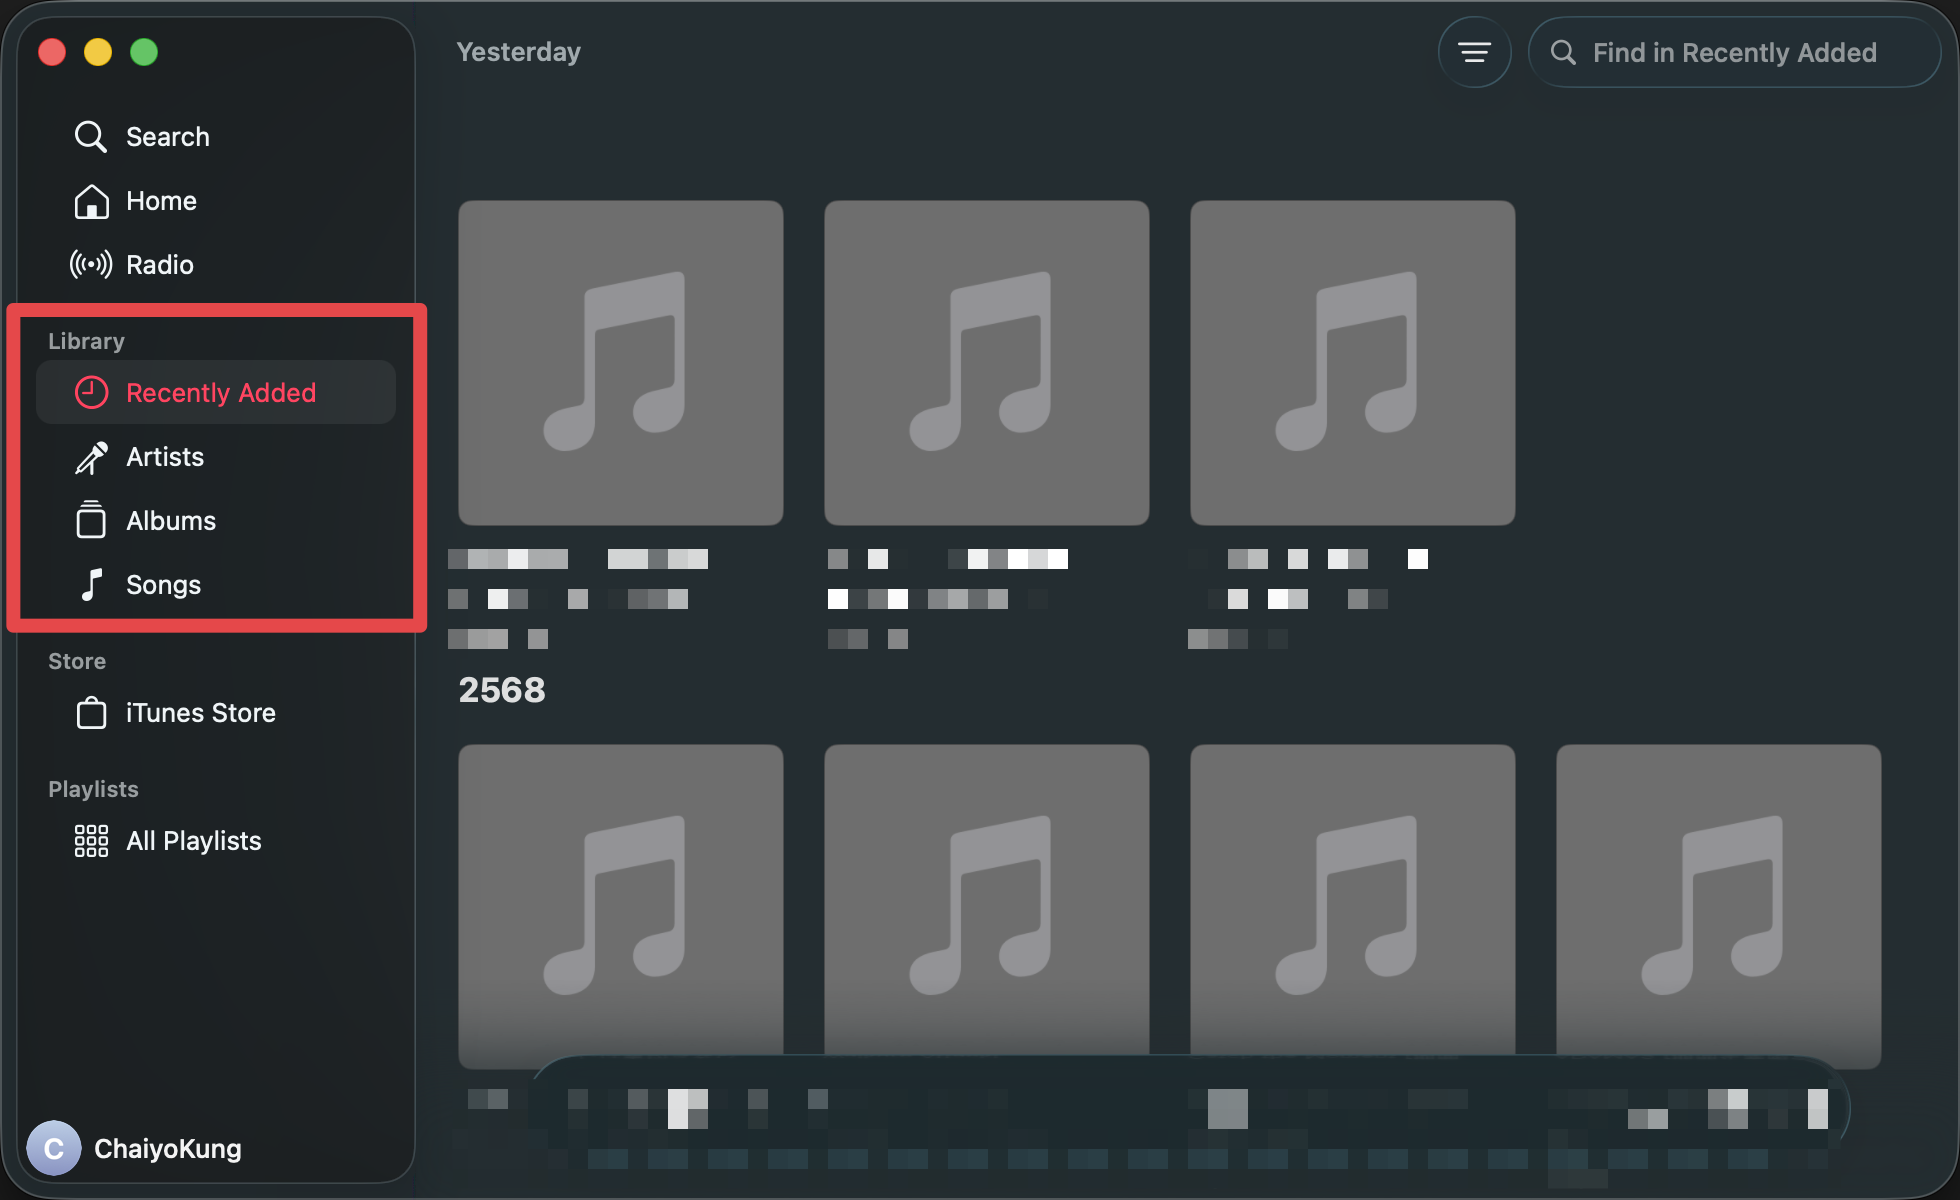
7. Find your songs in the Library
When the rip is done, all the songs show up in the Library of the Music app. You can find them in “Recently Added” and in their own album.
(Optional) Edit the song info later
Sometimes the song info from the online database is wrong or not complete. You can fix it yourself in the Music app. Right-click the song or the album and choose “Get Info”.
But personally, I fix the song info later with a program called Mp3tag. It’s free (on Mac it may cost money), and it’s really good at managing the tags of music files. It’s much easier!
That’s it! Now you have the music files from your CD on your computer. You can put them on your phone or a portable music player too.
I hope this helps you. Thank you!